Fabric Fusing Process Condition & Requirements in Garment Making
Conditions of Fabric Fusing
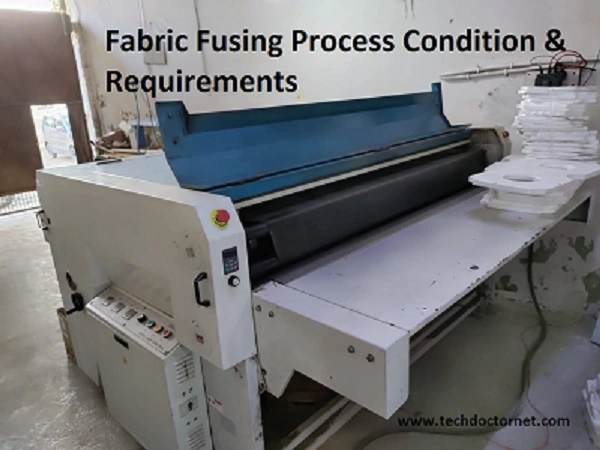
Fabric fusing has revolutionized garment construction, offering a faster and more seamless alternative to traditional sewing techniques. But achieving perfect results requires a touch of science! Understanding the crucial conditions for fabric fusing is key to creating garments with impeccable structure and a polished finish. Here we will explore more about Fabric Fusing Process Condition & Requirements in Garment Making.
Fabric Fusing:
Fusing is the most widely used process among the different alternative methods of fabric joining. The fusing procedure completely replaces the sewn interlining process. Fusing supports and stabilizes parts of a panel that are ready to be joined to a garment. Lets discuss more below about Fabric Fusing Process Condition.

Fabric fusing
The Three Musketeers of Fusing:
Flawless fusing hinges on a harmonious balance between three key elements: temperature, pressure, and dwell time (duration). Let’s delve deeper into each:
- Temperature: Every fabric and interlining combination has an ideal fusing temperature. Using the incorrect temperature can lead to disastrous consequences. Too high: Scorching or melting the fabric, weakening the bond, or causing strike-through (adhesive seeping through the fabric). Too low: A weak bond that might peel off or fail to properly adhere. Always refer to the manufacturer’s recommendations for the specific interlining you’re using.
- Pressure: Adequate pressure is vital for creating a strong and lasting bond between the fabric and interlining. Insufficient pressure: A weak bond that can separate during wear or washing. Excessive pressure: Causing impressions on the fabric or damaging delicate materials. Most fusing presses come with adjustable pressure settings, allowing you to fine-tune them for your project.
- Dwell Time: This refers to the duration the fabric and interlining are subjected to heat and pressure. Too short: An incomplete bond that might not hold securely. Too long: Damage to the fabric or unnecessary scorching. Similar to temperature, dwell time recommendations vary depending on the interlining and fabric type.
Tips for Perfect Fusing:
- Test, Test, Test: Before fusing directly onto your precious garment, always conduct a test on a scrap of fabric with the chosen settings. This allows you to fine-tune temperature, pressure, and dwell time before committing to the final piece.
- Invest in Quality Tools: A reliable fusing press with accurate temperature and pressure settings is crucial for consistent results.
- Consider Fabric Content: Delicate fabrics might require lower temperatures and shorter dwell times. Always research the specific needs of your fabric before fusing.
- Practice Makes Perfect: The more you experiment with different fabrics and interlinings, the more comfortable you’ll become with the fusing process.
Optimal Conditions for Fabric Fusing
1. Temperature
The temperature is one of the most critical factors in fabric fusing. It needs to be high enough to melt the adhesive on the interlining but not so high that it damages the fabric.
Key Considerations:
- Adhesive Melting Point: Ensure the temperature exceeds the melting point of the adhesive but remains within the safe range for the fabric.
- Fabric Sensitivity: Delicate fabrics like silk or synthetics require lower temperatures to prevent scorching or melting.
Recommended Practices:
- Pre-Test: Always test on a scrap piece of fabric to find the optimal temperature.
- Adjustable Heat Settings: Use a fusing machine with precise temperature controls to accommodate different fabrics.
2. Pressure
Pressure ensures that the adhesive spreads evenly and bonds firmly with the fabric. Insufficient pressure can result in poor adhesion, while excessive pressure can cause fabric distortion.
Key Considerations:
- Even Distribution: Pressure should be uniformly distributed across the fabric surface.
- Fabric Type: Thicker fabrics may require more pressure, while lightweight fabrics need gentle pressure to avoid flattening or creasing.
Recommended Practices:
- Calibrated Machines: Use fusing machines with adjustable pressure settings to match fabric requirements.
- Consistent Application: Apply consistent pressure throughout the entire fusing process to ensure uniform bonding.
3. Time
The duration of heat application is another vital factor. The adhesive needs enough time to melt and bond with the fabric but prolonged exposure can damage the fabric.
Key Considerations:
- Adhesive Activation Time: Different adhesives require different bonding times.
- Fabric Tolerance: Delicate fabrics require shorter bonding times to prevent damage.
Recommended Practices:
- Timer Settings: Use fusing machines with precise timer controls.
- Trial Runs: Conduct trial fusions to determine the optimal time for each fabric type.
4. Fabric Compatibility
Not all fabrics are suitable for fusing. Understanding the compatibility of fabrics with interlining materials is crucial.
Key Considerations:
- Fabric Type: Natural fabrics like cotton and wool generally fuse well, while synthetics may require special considerations.
- Interlining Type: Choose the interlining that matches the weight and stretch properties of the fabric.
Recommended Practices:
- Compatibility Testing: Test interlining on a small fabric piece before full application.
- Material Data Sheets: Refer to manufacturer guidelines for specific fabric-interlining combinations.
5. Moisture Control
Moisture can affect the fusing process by interfering with the adhesive bonding.
Key Considerations:
- Dry Fabric: Ensure the fabric is completely dry before fusing.
- Environment Control: Maintain a dry environment to prevent moisture accumulation.
Recommended Practices:
- Pre-Drying: Pre-dry fabrics if necessary, especially in humid conditions.
- Humidity Control: Use fusing equipment with built-in humidity control features.
Normal Conditions of Fusing:
The process of fusing must fulfill the following conditions:
- Luster: The laminate produced by the fusing should pose the desired luster in the finished garments.
- Strength: The strength of the bond of the laminate should be sufficient so that fabric of that is attached with interlining would not be separated. It is essential that that durability of the interlining should be equal or greater to the life time of the garments. Strength may be poor due to under fuse or the problem of determining the right fusing technique.
- Correct Fusing: Fusing must take place without causing strike through or strike back. During fusing, the fused resin can come to the front of outer fabric is called strike through. If the melted resins come towards below of the interlining fabric by penetrating is called strike back. Both strike through and strike back is unwanted and harmful for both garment and fusing machine.
- Compression by temperature: Fusing range is 150˚C to 175˚C. Outer fabric may shrink in that temperature. It is important to avoid shrinking while fusing. Otherwise generated components may be smaller than the desired size.
- Color of the fabric: During fusing, the color of the fused parts must not be changed. If the color of the fused parts be changed, within garments shade variation may found.
- Similarity in external shape: Pile fabric may bend in fusing due to high temperature. If that happens, fused and unfused fabrics can be seen different in external shape. Care must be taken to achieve similarity in exterior appearance.
- Special Characteristics: The fusing procedure must not destroy the fabric’s particular characteristics that have been acquired during finishing. Shower/water proof or wind proof properties of any fabric should remain unchanged after attaching interlining.

A Step-by-Step Guide of Fabric Fusing
Fabric fusing has become an indispensable technique for garment construction, offering a faster and more efficient way to add structure and stability to your projects. This guide will walk you through the fusing process, ensuring you achieve professional-looking results every time.
Materials and Tools:
| Material | Description |
| Fabric | The fabric you will be fusing interlining to. |
| Fusible interlining | A heat-activated adhesive material that bonds to fabric. Choose the type of interlining based on the weight and drape of your fabric and the desired outcome for your project. |
| Iron or heat press | A tool used to apply heat and pressure to activate the adhesive in the interlining. |
| Pressing cloth (optional) | A heat-resistant cloth placed over the fabric to protect it from scorching during ironing. |
| Scissors | To cut fabric and interlining to size. |
| Ruler (optional) | For precise placement of the interlining on the fabric. |
Prepping the Fabric and Interlining
- Cut your fabric and interlining to the desired size and shape. Ensure they align perfectly.
- Place the interlining on the wrong side of your fabric. The adhesive side of the interlining should be facing the fabric.
Fusing with an Iron
- Set your iron to the appropriate temperature for the interlining you’re using. Refer to the manufacturer’s instructions for specific settings.
- If using a pressing cloth, place it over the fabric and interlining. This protects delicate fabrics from scorching.
- Apply firm pressure with the iron, holding it in place for the recommended dwell time. Dwell time typically ranges from 10 to 30 seconds, depending on the interlining.
- Lift the iron and allow the fused area to cool completely. This ensures a strong and permanent bond.
- Repeat steps 3-4 for all areas that require fusing.
Fusing with a Heat Press
- Preheat your heat press to the temperature recommended for the interlining.
- Place the fabric and interlining between two pressing sheets (if provided with your press).
- Set the timer for the appropriate dwell time.
- Close the press and apply firm pressure.
- Open the press and allow the fused area to cool completely.
- Repeat steps 3-5 for all areas that require fusing.
Finishing Touches
- Once the fused areas have cooled completely, gently test the bond by pulling on the fabric and interlining. A secure bond shouldn’t separate.
- If using a pressing cloth, remove it carefully.
- Your fabric is now ready for further construction!
Conclusion:
By understanding and controlling the Fabric Fusing Process Condition, you can unlock its full potential. With a little practice and these helpful tips, you’ll be well on your way to creating garments that boast both beauty and structure, leaving you feeling like a true sewing superhero!